Hi guys,
When I got into shooting sports I started with a Colt 1911 Competition Series .45. I've since decided to do as much cosmetic modification as I can to it by myself because I broke the bank on it and I have a lot of fun tinkering with my stuff
I wanted to make a thread chronicling these changes. I've already come a ways on it so I'll start with what I started with and go over some of what I've done. 2 purposes here, one to show off my stuff and two in case someone wants to do some stuff to theirs on a budget.
So far I'm in this build around $50. Bought a compensator, a SS ambi safety, and a SS pin set. Obviously not everyone has access to the things I do to add embellishments but you would be surprised what you can find on a budget. New grips, comps, pins, hammers, and mainspring housing can be found fairly cheap and bought one at a time.
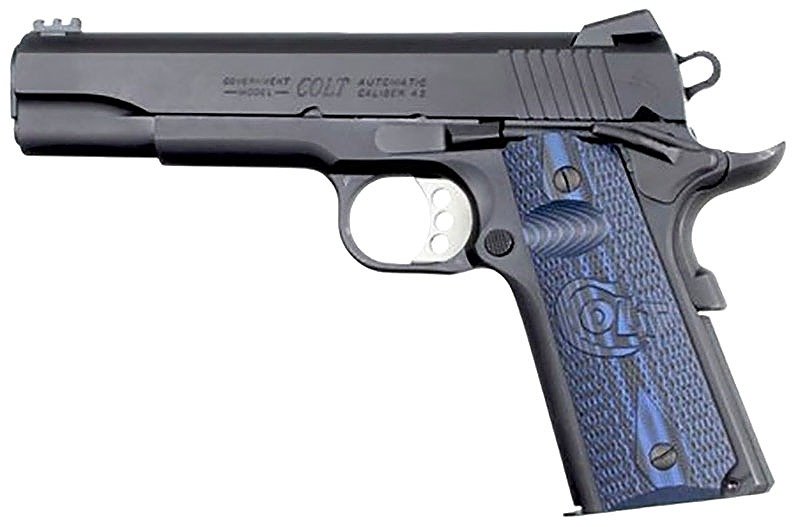
This is a stock photo of what I started with
The next step was grips. I decided to copy the colt design blue/black laminate and stipple it myself. I went with a Deadpool theme on it.
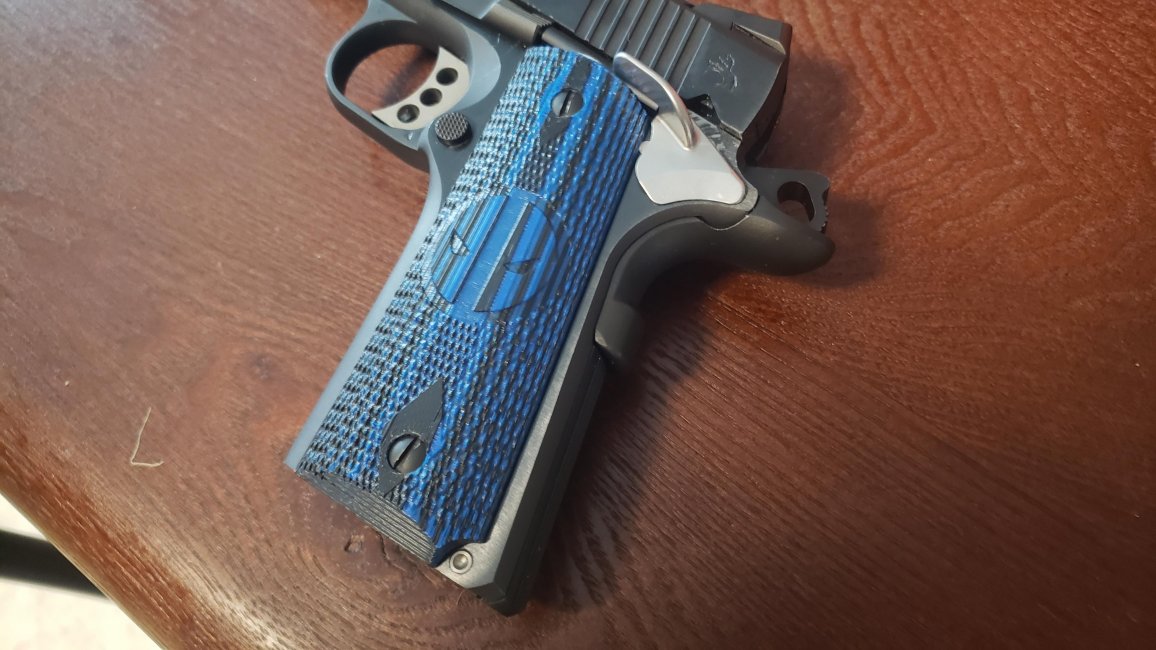
I'm really happy with them. I went through quite a bit of R&D on the stippling. It's not quite as pointy as the stock grips but definitely enough friction for me.
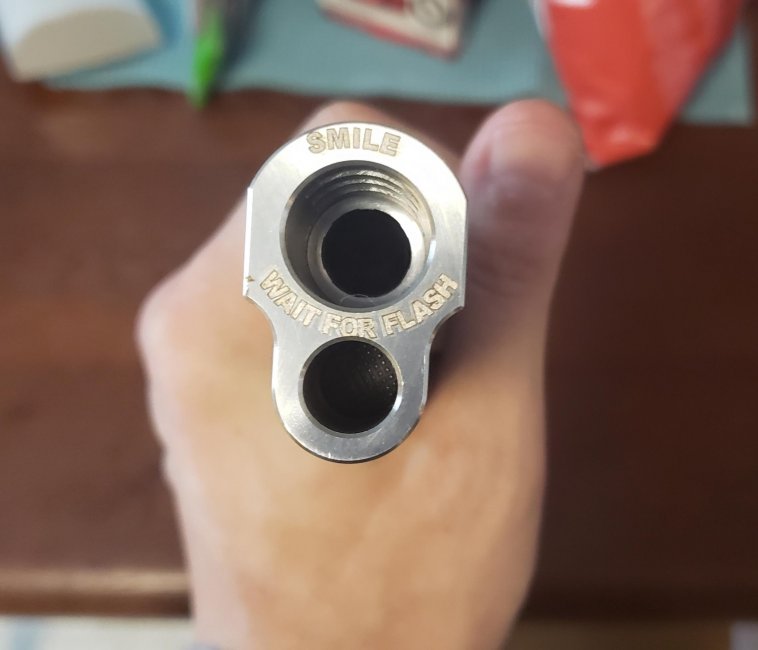
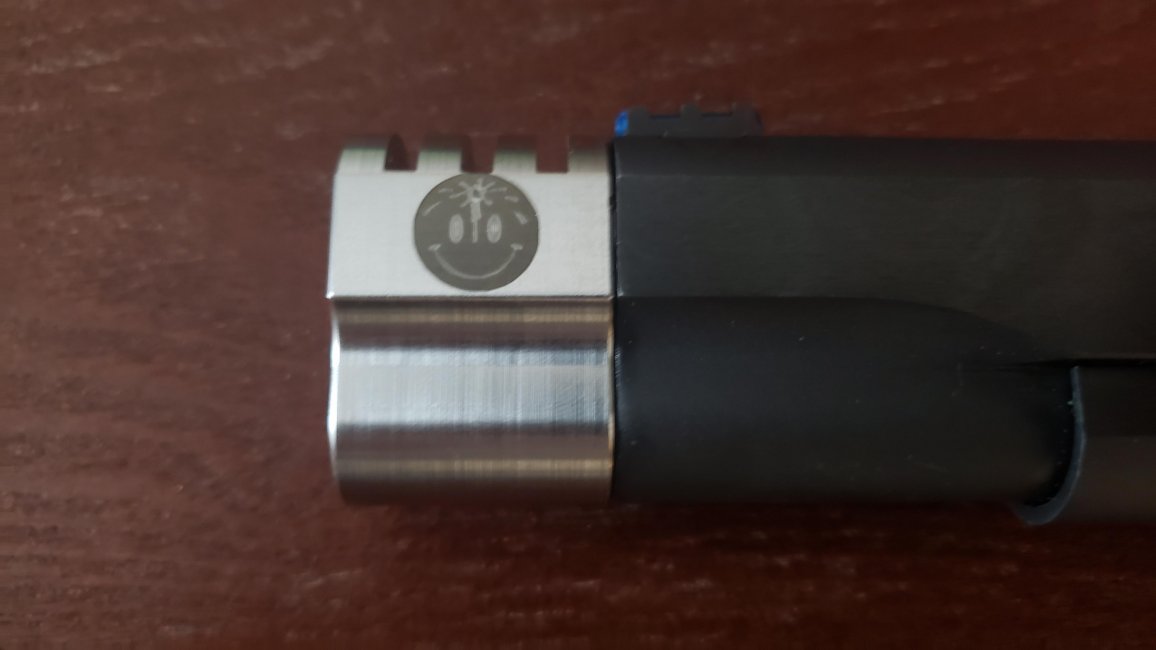
Then I decided to mod the compensator up and put on the ambi safety. I am obviously going for a blued/black with SS accents here. Compensator has "smile wait for flash" on the front of it. It's a little blurry because this was my first test run so I ran it a few times. Then one side of the comp has a smiley face with a bullet wound (in staying with the Deadpool theme). It's a straight black and white image but I'm going to attempt the same image in full greyscale on the other side soon. I'll post that once it's done.
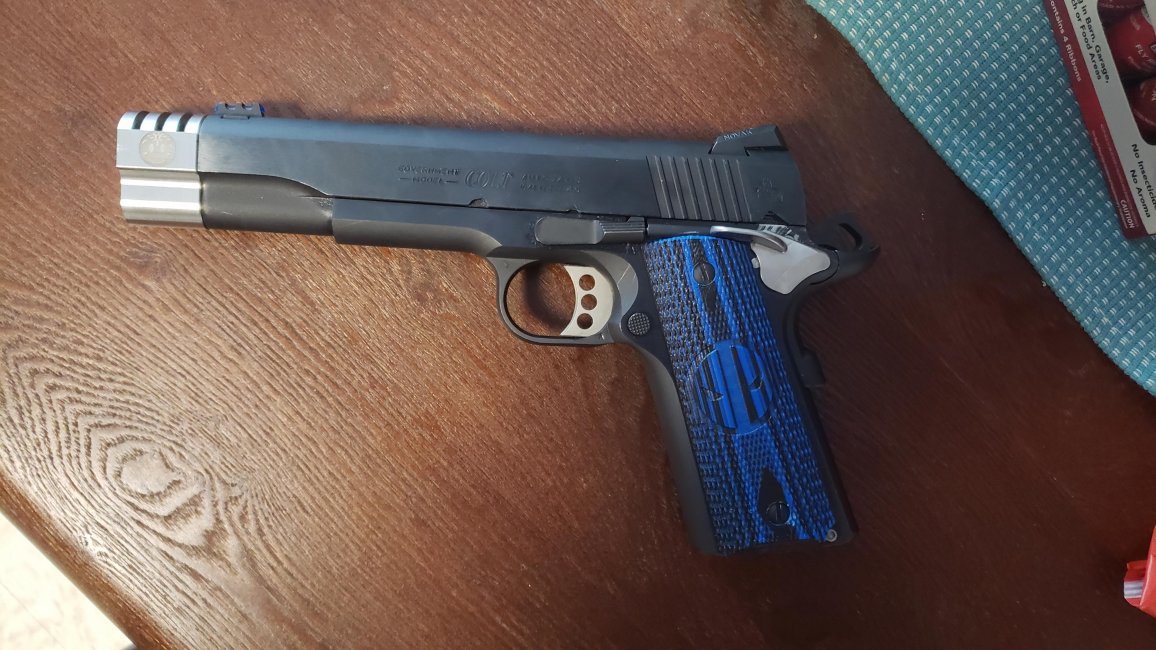
And here's the current end result. Let me know what you guys think. Anything you would do differently? I had a tough time fitting the ambi safety. It was a great learning experience. Current plan is to add more SS accents - hammer, MS housing, slide lock (extended), and maybe some others.
I'll post again when the next parts come in.
When I got into shooting sports I started with a Colt 1911 Competition Series .45. I've since decided to do as much cosmetic modification as I can to it by myself because I broke the bank on it and I have a lot of fun tinkering with my stuff
I wanted to make a thread chronicling these changes. I've already come a ways on it so I'll start with what I started with and go over some of what I've done. 2 purposes here, one to show off my stuff
 and two in case someone wants to do some stuff to theirs on a budget.
 So far I'm in this build around $50. Bought a compensator, a SS ambi safety, and a SS pin set. Obviously not everyone has access to the things I do to add embellishments but you would be surprised what you can find on a budget. New grips, comps, pins, hammers, and mainspring housing can be found fairly cheap and bought one at a time.
This is a stock photo of what I started with

The next step was grips. I decided to copy the colt design blue/black laminate and stipple it myself. I went with a Deadpool theme on it.

I'm really happy with them. I went through quite a bit of R&D on the stippling. It's not quite as pointy as the stock grips but definitely enough friction for me.
Then I decided to mod the compensator up and put on the ambi safety. I am obviously going for a blued/black with SS accents here. Compensator has "smile wait for flash" on the front of it. It's a little blurry because this was my first test run so I ran it a few times. Then one side of the comp has a smiley face with a bullet wound (in staying with the Deadpool theme). It's a straight black and white image but I'm going to attempt the same image in full greyscale on the other side soon. I'll post that once it's done.


And here's the current end result. Let me know what you guys think. Anything you would do differently? I had a tough time fitting the ambi safety. It was a great learning experience. Current plan is to add more SS accents - hammer, MS housing, slide lock (extended), and maybe some others.

I'll post again when the next parts come in.


