Brass Annealing

The #1 community for Gun Owners in Indiana

Member Benefits:

  • Fewer Ads!
  • Discuss all aspects of firearm ownership
  • Discuss anti-gun legislation
  • Buy, sell, and trade in the classified section
  • Chat with Local gun shops, ranges, trainers & other businesses
  • Discover free outdoor shooting areas
  • View up to date on firearm-related events
  • Share photos & video with other members
  • ...and so much more!
  • turnerdye1

    Master
    Rating - 100%
    63   0   0
    Dec 26, 2010
    2,099
    63
    North Central IN
    Who has an annealer and how often do you use it?

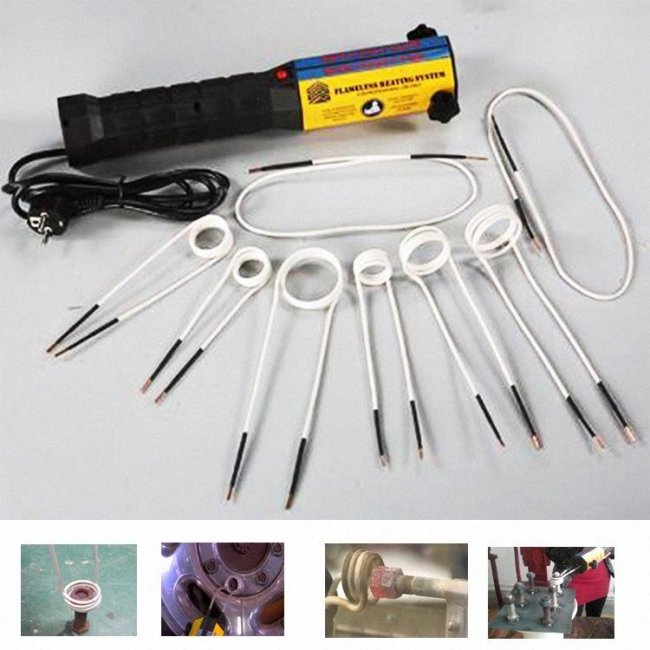
    I've been looking into annealing now since I'm converting alot of 223 brass to 300blk. And while researching I see alot of precision shooters anneal their brass as well. I've recently got into precision reloading also so now its something I may be investing in.

    Just wanted to know your guy's opinion and what you guys use. I know there are 300-2000 dollar models and those don't interest me too much. Maybe a 200-300 dollar model?
     

    bstewrat3

    Master
    Rating - 100%
    142   0   0
    Apr 26, 2009
    1,532
    84
    Beech Grove
    I use a cordless drill and a socket that fits the case head of the cartridge being annealed. I rig a jig each time to have a consistent hold in the flame and just count to whatever number I feel is appropriate for the situation. I know there's a metallurgist shaking their head right now, but it works for me.
     

    red_zr24x4

    UA#190
    Rating - 100%
    4   0   0
    Mar 14, 2009
    29,008
    113
    Walkerton
    Right or wrong, I've been loading since the early 90's and have never annealed anything, never had any issues. Especially out of semi-auto's, I tend to loose the brass before it gets work hardened / splits
    I know people that have been loading since the 70's and none of them anneal either
     

    shibumiseeker

    Grandmaster
    Rating - 100%
    51   0   0
    Nov 11, 2009
    10,745
    113
    near Bedford on a whole lot of land.
    Until you are in that class of shooter whose rifle is tuned and whose shooting discipline is honed, you aren’t going to notice any difference. It -does- make a difference to the benchrest shooter trying to eke out that last .1 moa after everything else is done, but most of us have more variability in other factors.
     
    Rating - 100%
    28   0   0
    Oct 3, 2008
    4,193
    149
    On a hill in Perry C
    Back when I was shooting bench rest I'd anneal brass by standing it up in a pan of water up to just below the neck, heat it with a torch then once it got to the right temp knock the case over into the water.
     

    DoggyDaddy

    Grandmaster
    Site Supporter
    Rating - 100%
    73   0   1
    Aug 18, 2011
    103,926
    149
    Southside Indy
    Back when I was shooting bench rest I'd anneal brass by standing it up in a pan of water up to just below the neck, heat it with a torch then once it got to the right temp knock the case over into the water.
    This is what I did exactly. It wasn't for bench rest shooting though. It was for making 30-40 Krag cases out of .303 Brit cases.
     

    russc2542

    Master
    Rating - 100%
    24   0   0
    Oct 24, 2015
    2,132
    83
    Columbus
    I found this thread to be a very good read on annealing ... and what will happen if you troll somebody too hard or too long.

    https://www.indianagunowners.com/fo...g/467550-who-has-auto-annealling-machine.html

    hmmm ... looks like the pictures are now missing ... still a good read.
    I remember it, that was a good one. lots of great info, different perspectives, and sh** throwing. That's the one that sent me down the rabbit hole of annealing. I built/assembled/3d printed my own automatic induction annealer. currently hand-fed but can easily adapt my Dillon casefeeder (already adapted it to the Lee APP).
     

    turnerdye1

    Master
    Rating - 100%
    63   0   0
    Dec 26, 2010
    2,099
    63
    North Central IN
    Thanks guys. I may end up skipping annealing. Im going to read through that thread above for some more tips and tricks in there.

    I just don't think the money spent is a good return on investment. If I do end up annealing it'll probably only be the home made 300 black out brass and I may do the water or socket method.
     

    warren5421

    Expert
    Site Supporter
    Rating - 100%
    7   0   0
    May 23, 2010
    855
    59
    Plainfield
    I shoot a lot of .45-70 and Star-Line up front tells you to anneal your cases if shooting black powder. Didn't do it and after the seond or third loading the cases started to crack I bought an Annealeez https://annealeez.com/product/annealeez/ and have not had any problems with my cases. I do any case bigger than a .44 WCF now. I have cases bought in 1999 that I am still using.
     

    JeepHammer

    SHOOTER
    Rating - 0%
    0   0   0
    Aug 2, 2018
    1,904
    83
    SW Indiana
    Anyone can claim anything on the internet, but this is from a brass manufacturer...
    I spent about $60,000 on a brass metallurgist to teach me how to heat treat production cartridge brass.
    .
    It turns out I did about everything wrong for 30 years, and he set me straight, I had brass that would pass government & industry standards.
    I'm not crapping on anyone that does things differently, if it works for them, then it's the way they know and should stick with.
    .
    1. Cartridge Brass is an alloy of copper & zinc, around/about 70% copper & 30% zinc.
    Zinc MELTS at 787.2°F.
    Zinc VAPORIZES at 1,662°F
    Copper melts at 1,984°F
    If this connects in your head, the TEMPERATURE matters a great deal.
    While an oxygen engorged 'Jet' torch is most commonly seen in home annealing videos, it can, and WILL melt the zinc out of the copper alloy easily.
    When you see a 'Silver Sheen' on the annealed area, the brass is ruined.
    *IF* you watch a reputable manufacturer video, they use a row of diffused flames, controlling the heat, while leaving the brass in the heat longer (time factor).
    .
    2. Brass is heat treated in 3 basic steps,
    And to understand why, you need to understand what happens to brass when it's 'Work Hardened'.
    Brass is crystalline in nature, when it's flexed, bits of the crystals break off and become 'Slivers'.
    The flexing, and the heat of being fired, allow those slivers to dislocate and wedge in at angles.
    There is no better way to apply separating pressure between joined surfaces than a wedge... A wedge is how we cut metal, wood, rock etc.
    The internal stress from these wedges/slivers jacks the brass structure apart, eventually you get a crack.
    Outside of that, the stressed ('work hardened') brass doesn't take sizing well, it wants to REBOUND, or 'Spring Back' into it's previous position.
    This means your brass doesn't come out of a fixed die/press consistently, and you won't ever have consistent neck tension/bullet hold in the neck.
    .
    The first stage of heat treating is simple stress relief.
    Heat (energy) expands the crystalline structure allowing the slivers to relocate into a 'Comfortable', more aligned position.
    This is heat AND TIME. Most people want to do it fast and apply excessive heat while NOT allowing enough time.
    .
    The second step is absorption of the slivers and dust broken off the main crystals/proper crystalline size.
    This takes a little more heat, and much more TIME, along with good heat control.
    Continuing to heat with high energy source, doesn't matter if it's gas, electromagnetic or whatever, you MUST control the energy fairly precisely.
    Exactly ZERO of the internet videos show an energy reduction for the second step to allow for time without over cooking the brass.
    .
    3. Reconstitution.
    With correct energy & time, the crystals will start to absorb each other.
    There is a quite specific crystal count per given area for 'Proper' cartridge brass,
    Too many/too small and it's called 'Microcrystaline'.
    Damaged/broken crystals are microcrystalline.
    Over heated and the crystals absorb each other, too few crystals that are too big and it's called 'Monocrystaline'.
    .
    I wish this forum allowed direct uploads,
    I have some pretty good scientific micrographs I've done on cartridges at different stages of testing, showing the cross sectional density punch ('Hardness') and scaling microscope with sizing scales to show how that process is done.
    They are also mounted, polished, stained and using polarized filters so you can actually see the grain size...
    What it looks like at the head where the brass is more compacted, how the grain changes as you move up the case, etc.
    .
    The first stage is easy, heat the brass, but keep it low enough the zinc doesn't melt and leach out of the alloy mixture.
    The second stage is a little more difficult, but you can do it easy enough with a reliable, repeatable press/die combo and an ACCURATE measuring device.
    Increase TIME (decreasing heat as needed) so you don't melt the zinc, and the brass comes out of the die so consistent you need a micrometer to tell the difference between brass in your test batch.
    STOP!
    Do NOT continue to heat, or leave in any longer than when the test batch comes out of the die super consistent.
    You are very near, or into the danger zone.
    .
    The third stage is reconstitution, and this takes microscopic inspection to determine when you are 'Exactly' correct on heat & time.
    You will need the hardware to section a case, mount it, polish it down to about 2 microns, etch & stain the sample, and have a measuring microscope to see the results of your heat treating process.
    .
    No one is going to drop $30,000 on scientific equipment for home reloading, so the 'Perfect' brass is out...
    What you can do is get about 90% the way to 'Perfect' by controlling heat & time,
    Checking your work in a rock solid, repeatable press/die combo with an accurate measuring device.
    The $49.99 press & $20 dies won't cut it, but a $150 rock chucker/proper die set and micrometer will get you to 90%.
     

    JeepHammer

    SHOOTER
    Rating - 0%
    0   0   0
    Aug 2, 2018
    1,904
    83
    SW Indiana
    Let's talk about heating methods...
    The factory has used hot dies, a metal die sitting on a wood or coal stove, the brass is simply dropped into the hot die to heat soak.
    Later, electrical resistance, like the old electric burners on a stove or the wires in a toaster were used to further control the heat factor.
    When we got into the age of bottle necked brass, and piped in gas was available,
    A row of diffused, fan tipped nozzles were used.
    The diffused flame controlled heat while the time it took for the case to travel a conveyor controlled time.
    .
    Now we are in the 21st century, electromagnetic heating is possible, and cost effective.
    Electrically produced magnetic currents pass through the brass, exciting the brass molecules directly, their movement both produces heat from friction INSIDE the brass, but it also promotes the slivers/dust to align, and further absorb back into their parent crystals.
    .
    A 'Cheap' way to do this is a 'Nut Buster' induction unit (starting about $150) that uses a wire coil around the brass, top down application like your press dies.
    You CAN melt down a brass case in just a few seconds, these things don't have a power control...
    .
    Then it's the time factor...
    How long you push the button on the single power units.
    An eBay digital timer is about $15 and gives you 1/100 second control of time.
    This is EXACTLY what the Fluxeon 'Annie' ($600+) and AMP ($1,800+) units use to heat cases, electromagnetic induction heating.
    .
    You *CAN* get your self a plumbers torch, but DO NOT use the focused 'Jet' tip.
    A diffused, cooler flame for a little longer time will get you started in the correct direction.
    Keep in mind a torch was never the best way to do things, just the most cost effective when the process was used...
    Times, processes and equipment have changed.
    .
    Do NOT rely on Tempilaq for your heat measurement.
    The first thing the brass engineer did was throw my Tempilaq out.
    It contains both copper & zinc, the case throws the readings off.
    800°F will change color before 600°F will change, the first thing he proved to me, and Tempilaq has confirmed the results.
    They do make a thermochromactic paint for brass, but the price will shock you.
    A $20 infrared pyrometer (no touch 'Heat Gun' with the laser) will do a better job than Tempilaq.
    .
    *IF* you go induction, and the brass overheats before you get enough time for consistent resizing...
    Use a larger, less efficient coil on the induction unit.
    The smaller ('Tighter') the coil, the more efficient, the larger, more air gap, the less efficient.
    Magnetic fields reduce exponentially with increased area, so you can control power applied to the case this way.
    I have built my own two step, two power levels to the coil driver to compensate.
    The driver really doesn't care much about input voltage, so from 48 to 24 volts, the first gets the case up to temp, the second holds the temp for the time factor needed to reabsorb slivers & dust back into the crystalline structure.
    .
    If you go this way, we can talk about inductors, like using a ceramic ferrite ring with a slot cut into it for the case neck/shoulder.
    By shaping the ferrite slot you can apply more or less energy to specific points on the case...
    For instance, the mouth is the thinnest, often champfered, so it overheats easily, while the case will be the hardest to anneal at the outside shoulder bend,
    It's both the thickest, and it gets moved around/work hardened more every time it's fired.
    The neck walls expand, get crushed down by the dies, then an expander ball gets dragged through to open it back up...
    A little more attention here is a good thing, but it's not the 101 class basic stress relief is.
    .
    I've always said any annealing is good annealing provided the brass doesn't get overcooked.
    Start low, sneak up on a good anneal, and STOP when the results show you have made what you want.
     

    JeepHammer

    SHOOTER
    Rating - 0%
    0   0   0
    Aug 2, 2018
    1,904
    83
    SW Indiana
    Let me see if this works...
    Just because I can see it doesn't mean the forum will allow it, so someone needs to say something if it appears.
    If it does, a 'Bolt Buster' induction unit.
     

    Attachments

    • induction-heater-bolt-heat-disassembler-screw.jpg
      induction-heater-bolt-heat-disassembler-screw.jpg
      65.6 KB · Views: 4

    JeepHammer

    SHOOTER
    Rating - 0%
    0   0   0
    Aug 2, 2018
    1,904
    83
    SW Indiana
    I *Hope* no one believes the old myth you can tell anything about the brass by pinching the neck with a pair of pliers....
    A common myth passed along, but it just isn't true.
    .
    A cross sectional density ('Hardness') test starts with calibrating a Rockwell or Vickers machine.
    A known 'Hardness' test block of material is put into the machine...
    The machine is triggered to drive a punch into that block at a very specific force.
    That test block is a known 'Hardness' and the punch mark has to be inspected under a microscope, the size/depth of the mark has to be measured precisely.
    Machine adjusted as necessary to get a scientific standard.
    The punch has to be inspected to see if has the correct angles ground into the punch, see if it has wear/rounded over edges, etc.
    This is a base line test.
    .
    Once calibrated to scientific standards,
    A sectioned case has to be mounted in a non-compressable material,
    Polished to about 2 microns, inspected for existing faults,
    Then it can go into the punch machine.
    .
    The depth is controlled by the surface area of the punch, the size of the punch mark is measured, and the 'Hardness' rating can be given from the size of the mark.
    .
    An example of a case neck wall with Rockwell punch being measured.
    A trick of the light makes it look like a pyramid standing up to some people, but it's actually a dimple into the brass.
    The compaction density of the brass allows the punch to go deeper in 'Softer' brass, leaving a larger dimple.
    'Harder', stressed brass, or different alloy brass might have a smaller, more shallow dimple.
    IMI_neck_100_HV500_320x_dichromate.jpg
     

    JeepHammer

    SHOOTER
    Rating - 0%
    0   0   0
    Aug 2, 2018
    1,904
    83
    SW Indiana
    A case head, between powder chamber floor and extraction groove with two Rockwell punches (the black dots).
    Notice right side brass is more compact, different color under polarized light while left the brass is lighter in color, less compacted...
    FC_head_25x_dichromate.jpg
     

    JeepHammer

    SHOOTER
    Rating - 0%
    0   0   0
    Aug 2, 2018
    1,904
    83
    SW Indiana
    Choose your heat source, that's up to you.

    Heat & Time.
    Don't turn the brass 'Silver', that's zinc cooking out of the alloy.

    If you get 'Silver' back the heat off, increase time if necessary.

    When the brass resizes almost exactly the same, stop increasing heat/time.
    You are where you want to be, consistentncy.
     
    Top Bottom