Reloading bench tips, recommendations, etc..

The #1 community for Gun Owners in Indiana

Member Benefits:

  • Fewer Ads!
  • Discuss all aspects of firearm ownership
  • Discuss anti-gun legislation
  • Buy, sell, and trade in the classified section
  • Chat with Local gun shops, ranges, trainers & other businesses
  • Discover free outdoor shooting areas
  • View up to date on firearm-related events
  • Share photos & video with other members
  • ...and so much more!
  • phylodog

    Grandmaster
    Rating - 100%
    59   0   0
    Mar 7, 2008
    18,936
    113
    Arcadia
    I've only got around 4' of wall space for this one. I'll be mounting an RCBS Rockchucker to an Inline Fabrication Unimount toward the right side of whatever I end up with. I don't think anything else will be permanently mounted to the surface. Here is what I've sketched out so far, definitely not settled on this unimpressive design.

    Bs8RBf8h.jpg
     

    turnerdye1

    Master
    Rating - 100%
    63   0   0
    Dec 26, 2010
    2,099
    63
    North Central IN
    I bought (4) 4" L brackets from ACE and anchored my benchtop into the studs in the wall. I run a 650 on it and have zero rock or shake at all. Just a thought to lock everything down
     

    Double T

    Grandmaster
    Rating - 100%
    15   0   1
    Aug 5, 2011
    5,955
    84
    Huntington
    I currently have a shaky little metal frame "bench" that was gifted to me. The top seems like it's made of compressed cardboard. Considering making one out of 2x4's, I made my gaming desk, which is a modifed "L" or corner desk, but I still don't know if I want to go through that hassle.
     

    natdscott

    User Unknown
    Trainer Supporter
    Rating - 100%
    5   0   0
    Jul 20, 2015
    2,810
    113
    .
    Use a 2x6" on the wall. If possible, put the bench in a corner, and use 2x6" on BOTH walls. Attach said 2x6" with 2x if not 3x 4" Timberlok fasteners into each of the studs...if it is masonry, then I'd hammer drill and use strike anchors.

    The frame of the bench gets made from dry (DRY) 4x4" lumberr with 2x4" only used as tertiary support for things like shelves. Ideally, I'd buy all the lumber from an indoor supplier several months before I needed it. Actually..I did.

    The frame should be dovetailed/mortised into the 2x6" on the wall.

    Once you have all the frame pieces cut and filed and mortised and massaged into dry fit, make sure they all work IN PLACE and produce a fairly level platform across all parts of the frame checked with a 6-foot bubble.

    Happy with that, fasten all those pieces/parts together with 3-4" Timberlok fasteners, and/or #10 cabinet screws. Countersinking and/or forstner bits are going to be helpful.

    I personally recommend the use of an epoxy like Devcon FasMetal or PlasticSteel in the joints to take up all available space and strengthen the system.

    Once the frame is done, get to work on the 1.5" x 25" x 4-foot piece of oak or maple butcher block that will become the top. Sand the bottom to a finish of about 220. BLOCK sand the top to a start of 320. Trust me, blocking the top to 320 to start making it flat WILL take awhile. All those cross-laid pieces do not dry together, so their dimensions...even planed from the factory...do not stay the same.

    When you place the block on it's frame, you'll immediately see why it was EXTREMELY important to level and more-or-less "hone" the surface of the frame: butcher block doesn't bend, and it won't take any of your sh#$. It don't care.

    So the solution is Devcon FasMetal. Spend a lot of time to shim the top anywhere it needs it, same as you would a counter or a door. Get the 320-sanded top 100% level, or at least make sure the tilt is the direction and amount you WANT (I tip mine a few degrees toward the wall so stuff won't roll off the front). Cross check the level and bearing of the shims 1,000 times if it needs it.

    With HELP, The spaces between the shims may now be filled with globs of Devcon FasMetal. Now I warn you, if you're familiar with Devcon 10210, 10110, etc...FasMetal is NOT the same deal. It is actually stronger, but it is a relatively dragster-like cure. It WILL catch you if you're not hurrying. That said, it is also thick enough to stay in place like a putty, which is why it gets the nod for this task.

    Once the epoxy is cured (24 hours is good), I start the drilling for the 6" #10 cabinet screws that will be placed every 6-8" along the back, and then down the front of the frame. Butcher block must be DRILLED for shank diameter clearance of any fastener, or you risk splitting it. So anyway...use your 1/2" forstner bit to cut a countersink for each fastener, then use appropriate drill bit for the cabinet screw itself, through the bench and into the 2x6" or 4x4" frame.

    Go heavy on the fasteners on the front frame rail...it takes the majority of the force of running a press.

    Once it's all locked down, install hardwood plugs in the countersink holes, and dress them down to flush, finishing with the grain with the same 320 paper. While sanding, pay special attention to "cross sanding" to keep the 'ripples' of the butcher block flattened. Granted that goes against conventional wood finishing wisdom, but the cuts can still be removed with the next grit...just takes some work.

    At 320, I stop, clean everything up, and inspect for dings, dents, etc. Any dents get steamed to see if they'll pop out. Anything left after that gets filled with a mixture of Titebond III and 400-grit sanding dust saved for this purpose.

    Once that glue/filler is dry, dress it down, and finish sand everything to 400, then 600.

    Everything then gets cleaned and vacuumed.

    Inspect one last time for any loose joints, flex in the top, pull up/down, any "knocking", etc.

    If that's good, proceed to finishing. I recommend using what is required for butcher blocks anywhere else: Howard Butcher Block Conditioner.

    I put a heavy layer of the conditioner all over the bench with gloved hands, then wet sand the snot out of it with 800 or 1,000 grit paper for a Disney-movie length of time. Unlike linseed, tung, etc..this stuff has so much mineral oil it doesn't dry out very much. I cross sand here as well, and the result after a few days of this, and hand-rubbing is a nice uniform satin polished finish. It can help to use a hair dryer as well.

    When you've done 3 coats on top, bottom, and sides of the block top, wipe off all excess, and really buff the surface.

    The only last step is to use a clear silicone caulk to fill the gap along the wall, and repaint any spots on the wall that got dinged or dirty during the install. The clear caulking is nearly invisible when dry, but really finishes the top, and prevents anything from rolling into the 1/16" to 1/4" crack back there...to be lost forever. Like an R700 ejector spring. Or something.

    Um..

    ---Make sure before you finish the top that you have the ability to run power/data cords from the bottom to the top, if needed. 3/4" to 1" forstner and a notch in the 2x6" at the back...

    ---I like 3/4" A-grade Oak plywood for shelving under/over the bench. The same block conditioner looks good on 400-grit sanded shelves. Steel A-frame 100 pound shelf brackets on each stuf work really well, but still leave air space and wiring space for....

    ---Adjustable LED Puck lights on the underside of a shelf over the bench are REALLY nice for removing the dark space at the back of the bench. That, plus a main light source, maybe a movable task light, and some of the press lights from Inline Fabrication, and old guys like you and I can actually see to do work.

    --Use 1/4" Stainless T-nuts to attach the Inline Mount to the bench with socket-head cap screws. That way, it's 110% solid, but IS removable easily.

    --DO get the "Easy change"...or whatever he calls it...mount from Inline. It's handy.

    I'm sure I'll think of something else, but that's it for now.


    -Nate
     

    bobjones223

    Master
    Rating - 98.2%
    55   1   0
    Mar 3, 2011
    1,788
    77
    Noblesville, IN
    Use a 2x6" on the wall. If possible, put the bench in a corner, and use 2x6" on BOTH walls. Attach said 2x6" with 2x if not 3x 4" Timberlok fasteners into each of the studs...if it is masonry, then I'd hammer drill and use strike anchors.

    The frame of the bench gets made from dry (DRY) 4x4" lumberr with 2x4" only used as tertiary support for things like shelves. Ideally, I'd buy all the lumber from an indoor supplier several months before I needed it. Actually..I did.

    The frame should be dovetailed/mortised into the 2x6" on the wall.

    Once you have all the frame pieces cut and filed and mortised and massaged into dry fit, make sure they all work IN PLACE and produce a fairly level platform across all parts of the frame checked with a 6-foot bubble.

    Happy with that, fasten all those pieces/parts together with 3-4" Timberlok fasteners, and/or #10 cabinet screws. Countersinking and/or forstner bits are going to be helpful.

    I personally recommend the use of an epoxy like Devcon FasMetal or PlasticSteel in the joints to take up all available space and strengthen the system.

    Once the frame is done, get to work on the 1.5" x 25" x 4-foot piece of oak or maple butcher block that will become the top. Sand the bottom to a finish of about 220. BLOCK sand the top to a start of 320. Trust me, blocking the top to 320 to start making it flat WILL take awhile. All those cross-laid pieces do not dry together, so their dimensions...even planed from the factory...do not stay the same.

    When you place the block on it's frame, you'll immediately see why it was EXTREMELY important to level and more-or-less "hone" the surface of the frame: butcher block doesn't bend, and it won't take any of your sh#$. It don't care.

    So the solution is Devcon FasMetal. Spend a lot of time to shim the top anywhere it needs it, same as you would a counter or a door. Get the 320-sanded top 100% level, or at least make sure the tilt is the direction and amount you WANT (I tip mine a few degrees toward the wall so stuff won't roll off the front). Cross check the level and bearing of the shims 1,000 times if it needs it.

    With HELP, The spaces between the shims may now be filled with globs of Devcon FasMetal. Now I warn you, if you're familiar with Devcon 10210, 10110, etc...FasMetal is NOT the same deal. It is actually stronger, but it is a relatively dragster-like cure. It WILL catch you if you're not hurrying. That said, it is also thick enough to stay in place like a putty, which is why it gets the nod for this task.

    Once the epoxy is cured (24 hours is good), I start the drilling for the 6" #10 cabinet screws that will be placed every 6-8" along the back, and then down the front of the frame. Butcher block must be DRILLED for shank diameter clearance of any fastener, or you risk splitting it. So anyway...use your 1/2" forstner bit to cut a countersink for each fastener, then use appropriate drill bit for the cabinet screw itself, through the bench and into the 2x6" or 4x4" frame.

    Go heavy on the fasteners on the front frame rail...it takes the majority of the force of running a press.

    Once it's all locked down, install hardwood plugs in the countersink holes, and dress them down to flush, finishing with the grain with the same 320 paper. While sanding, pay special attention to "cross sanding" to keep the 'ripples' of the butcher block flattened. Granted that goes against conventional wood finishing wisdom, but the cuts can still be removed with the next grit...just takes some work.

    At 320, I stop, clean everything up, and inspect for dings, dents, etc. Any dents get steamed to see if they'll pop out. Anything left after that gets filled with a mixture of Titebond III and 400-grit sanding dust saved for this purpose.

    Once that glue/filler is dry, dress it down, and finish sand everything to 400, then 600.

    Everything then gets cleaned and vacuumed.

    Inspect one last time for any loose joints, flex in the top, pull up/down, any "knocking", etc.

    If that's good, proceed to finishing. I recommend using what is required for butcher blocks anywhere else: Howard Butcher Block Conditioner.

    I put a heavy layer of the conditioner all over the bench with gloved hands, then wet sand the snot out of it with 800 or 1,000 grit paper for a Disney-movie length of time. Unlike linseed, tung, etc..this stuff has so much mineral oil it doesn't dry out very much. I cross sand here as well, and the result after a few days of this, and hand-rubbing is a nice uniform satin polished finish. It can help to use a hair dryer as well.

    When you've done 3 coats on top, bottom, and sides of the block top, wipe off all excess, and really buff the surface.

    The only last step is to use a clear silicone caulk to fill the gap along the wall, and repaint any spots on the wall that got dinged or dirty during the install. The clear caulking is nearly invisible when dry, but really finishes the top, and prevents anything from rolling into the 1/16" to 1/4" crack back there...to be lost forever. Like an R700 ejector spring. Or something.

    Um..

    ---Make sure before you finish the top that you have the ability to run power/data cords from the bottom to the top, if needed. 3/4" to 1" forstner and a notch in the 2x6" at the back...

    ---I like 3/4" A-grade Oak plywood for shelving under/over the bench. The same block conditioner looks good on 400-grit sanded shelves. Steel A-frame 100 pound shelf brackets on each stuf work really well, but still leave air space and wiring space for....

    ---Adjustable LED Puck lights on the underside of a shelf over the bench are REALLY nice for removing the dark space at the back of the bench. That, plus a main light source, maybe a movable task light, and some of the press lights from Inline Fabrication, and old guys like you and I can actually see to do work.

    --Use 1/4" Stainless T-nuts to attach the Inline Mount to the bench with socket-head cap screws. That way, it's 110% solid, but IS removable easily.

    --DO get the "Easy change"...or whatever he calls it...mount from Inline. It's handy.

    I'm sure I'll think of something else, but that's it for now.


    -Nate

    Nate, He!! of a nice wright up!!

    I will say that I have been told I over engineer everything I do....we should hang out!:laugh:
     

    Leadeye

    Grandmaster
    Rating - 100%
    4   0   0
    Jan 19, 2009
    36,915
    113
    .
    Make it larger than you think you need, and a bottom shelf is handy to store heavy stuff on for added stabilization and vibration reduction.
     

    sloughfoot

    Grandmaster
    Rating - 100%
    26   0   0
    Apr 17, 2008
    7,155
    83
    Huntertown, IN
    I am so embarrassed. I don't have anything nice like you guys. None of my stuff is bolted to a wall. The entire basement is mine though.

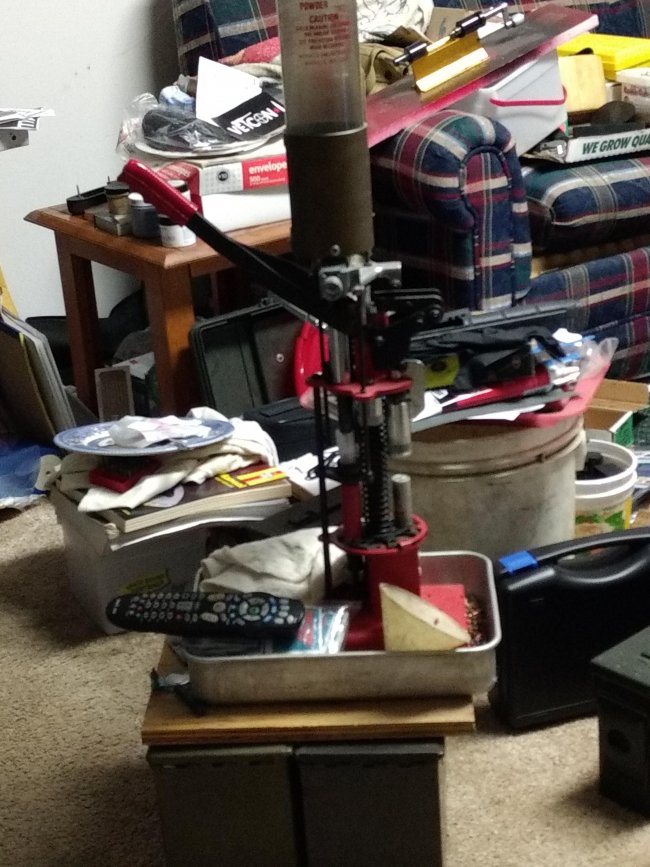
    Here is my 12 gauge shotgun reloader. It is on the floor between my recliner and the television. I like to watch television while reloading.

    Shotgun reloader.jpg

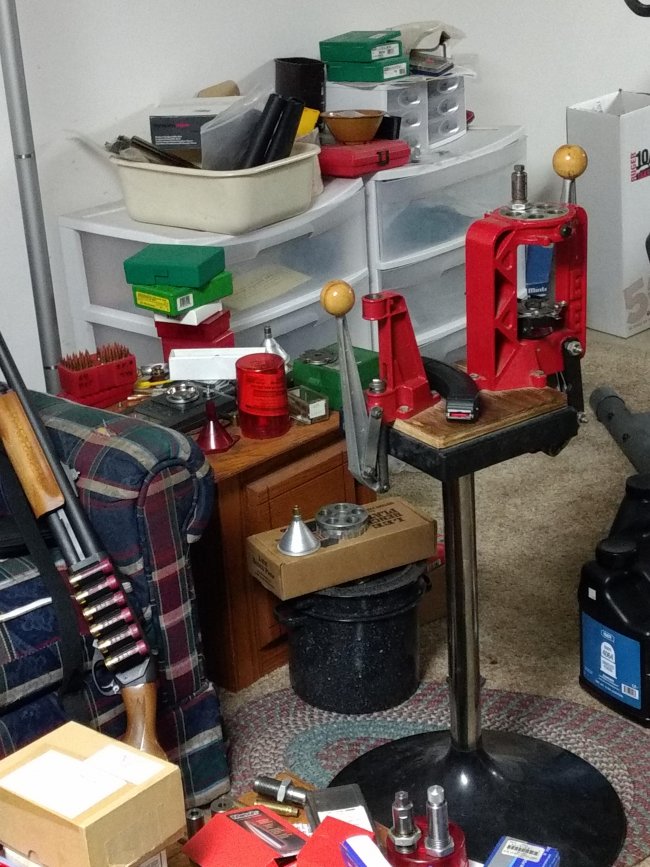
    My rifle reloading setup. I move it around as needed.

    Rifle reloader.jpg

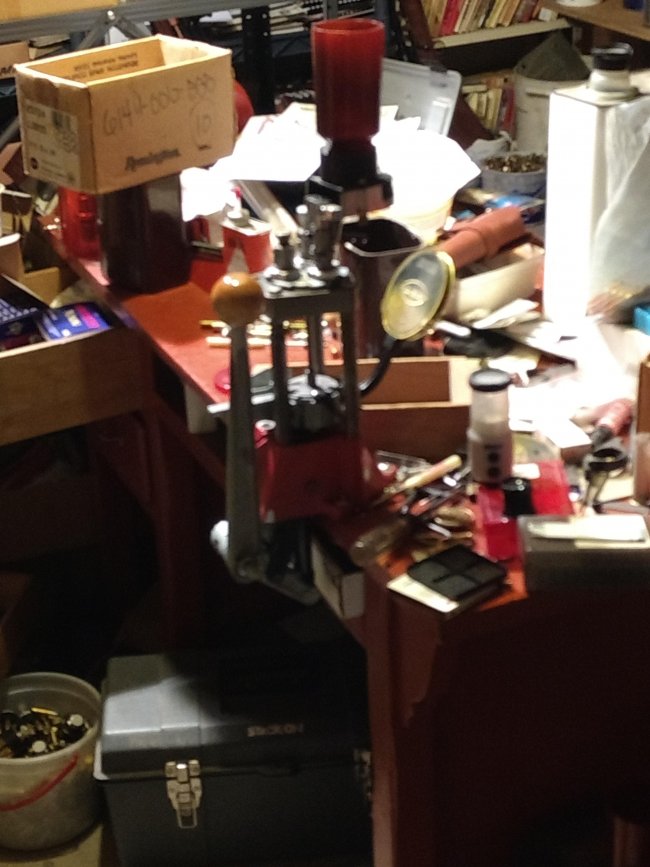
    My pistol caliber reloading setup.. It is mounted on a bench that was my grandfathers. It moves slightly every time I pull the handle. I just loaded up a couple thousand .357 magnum rounds.

    Pistol Reloader.jpg

    One time, at Camp Perry during the long range championships, Mitchell Maxberry stopped by my suburban in the parking lot while I was loading my .308 ammo for the upcoming Palma match with a Lee hand press. We talked for a while and he handed me 155 grain bullets for seating. I shot OK in the Palma match. I was not hindered by my ammo. I prefer to load my 1,000 yard ammo the day of the match. Sometimes off the back of my Harley.. I have witnesses.
     

    Buzz Saw

    Plinker
    Rating - 0%
    0   0   0
    Dec 20, 2012
    40
    8
    Southeast IN
    Great benches and ideas from all in this thread. My reloading bench is a kitchen island from brother in laws kitchen remodel. Heavy, thick top with Formica and reasonable amount of storage underneath for supplies, bullets, etc. Absolutely no movement with a Dillon 550 on top. It always amazes me to see U tube videos of self proclaimed reloading "experts" using their press on some flimsy bench and the press is rocking back and forth like it's mounted to a mattress.:)
     

    natdscott

    User Unknown
    Trainer Supporter
    Rating - 100%
    5   0   0
    Jul 20, 2015
    2,810
    113
    .
    One time, at Camp Perry during the long range championships, Mitchell Maxberry stopped by my suburban in the parking lot... We talked for a while...

    Do you mean he talked and you listened?

    Guy's an ass of a magnitude that must surely have taken his entire life's worth of effort to attain.

    -Nate
     

    sloughfoot

    Grandmaster
    Rating - 100%
    26   0   0
    Apr 17, 2008
    7,155
    83
    Huntertown, IN
    I forgot to show my rifle powder measure. I was going to use butcher block and epoxy and lag screws but I ran out of time. It is a pretty good Harrel measure.

    5373x1.jpg
     

    natdscott

    User Unknown
    Trainer Supporter
    Rating - 100%
    5   0   0
    Jul 20, 2015
    2,810
    113
    .
    Nate, He!! of a nice wright up!!

    I will say that I have been told I over engineer everything I do....we should hang out!:laugh:

    Thanks Bob!

    I do indeed try to make things break-proof! :): I also wanted this one to support a bench top lathe and/or mill at some point if needed. It would do it.

    -Nate
     

    sloughfoot

    Grandmaster
    Rating - 100%
    26   0   0
    Apr 17, 2008
    7,155
    83
    Huntertown, IN
    Do you mean he talked and you listened?

    Guy's an ass.

    -Nate

    He talked. I talked. We joked. We laughed. I have never had a problem with him. He has got burnt a few times. He can be bitter. He is a fierce competitor. I knew him long before he moved out of the country. We all have a story. I guess maybe you and I do too.
     

    Bennettjh

    Grandmaster
    Site Supporter
    Rating - 100%
    5   0   0
    Jul 8, 2012
    10,476
    113
    Columbus
    I took a small computer desk and added a "frame" with a sheet of 3/4 particle board on top and bottom. Then put 2x4s on the top and sides with gussets. Bolted the press down with big, high strength bolts and nuts. It's really heavy but extremely sturdy. I was surprised how much leverage gets put on the press/bench when in use.:twocents:
     
    Top Bottom